
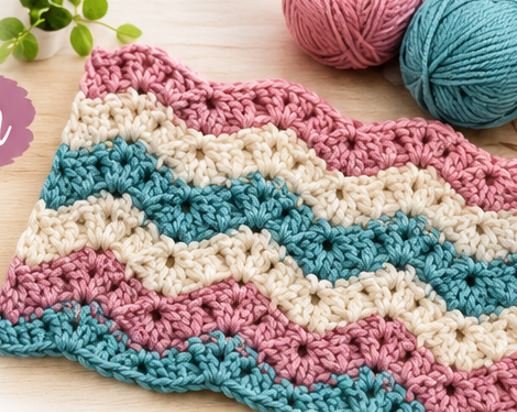
The Crossed Ripple Stitch creates a beautiful, wavy texture with a twisted effect. It is ideal for crochet blankets, scarves, baby items, and many other handmade projects.
Materials You Will Need
- Worsted-weight yarn in your favorite colors
- Crochet hook (5 mm / H-8, or the size recommended for your yarn)
- Scissors
- Yarn needle for weaving in the ends
Step 1: Make a Foundation Chain
Start by making a foundation chain in a multiple of 16 stitches, plus 2 extra chains.
For example, chain 66 stitches (16 × 4 + 2). This will give you approximately four ripple repeats.
Step 2: Work Row 1 – Double Crochet
Skip the first 2 chains. Make 1 double crochet stitch in each remaining chain across the row.
When you reach the end, turn your work.
Step 3: Work Row 2 – Crossed Double Crochet
Chain 3. This counts as your first double crochet stitch.
Skip 2 stitches and work 1 double crochet in the next stitch. Then make 1 double crochet in the skipped stitch, crossing over the stitch you just made.
Repeat this pattern across the row:
- Skip 2 stitches.
- Work 1 double crochet in the next stitch.
- Work 1 double crochet in a skipped stitch to create the crossed effect.
- Repeat across the row and turn your work.
Step 4: Work Row 3 – Double Crochet
Chain 3, then make 1 double crochet in each stitch across the row.
Keep your stitches even to maintain a neat, consistent texture. Turn your work at the end of the row.
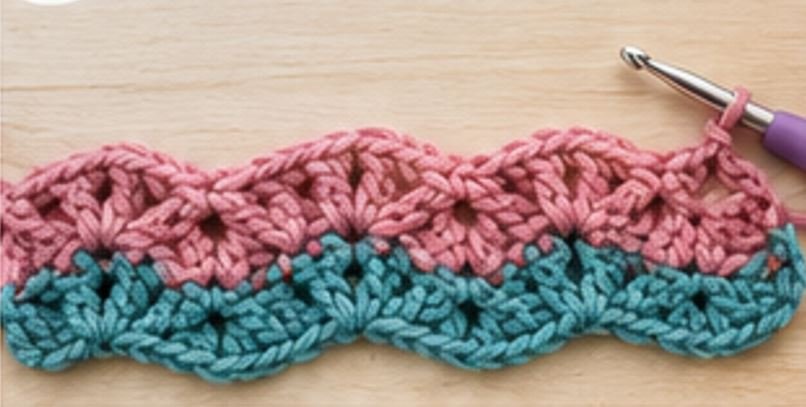
Step 5: Work Row 4 – Crossed Double Crochet
Chain 3, then repeat the crossed double crochet pattern from Step 3.
Skip 2 stitches, work a double crochet in the next stitch, and then work a double crochet in the skipped stitch to create the crossed effect.
Continue the pattern across the row and turn your work.
Step 6: Repeat the Pattern
Continue repeating Rows 3 and 4 until your crochet piece reaches the desired length.
You can change yarn colors every few rows to emphasize the ripple effect and create a beautiful striped design.
Finish with a row of double crochet if you want a clean, straight edge. Fasten off your yarn and weave in all loose ends with a yarn needle.
Tips for Success
- Choose smooth yarn: Smooth yarn makes the crossed stitches easier to see.
- Keep your tension even: Consistent tension helps create neat, uniform ripples.
- Experiment with colors: Try combinations such as pink, cream, and teal for a soft, modern look.
- Practice first: Make a small swatch before starting a large project.
- Count your stitches: Check your stitch count at the end of each row to help keep the edges straight.
What Can You Make with the Crossed Ripple Stitch?
This textured stitch works beautifully for:
- Crochet blankets and throws
- Baby blankets
- Cozy scarves
- Cushion covers
- Decorative home accessories
Enjoy your crochet project! With a little practice, the crossed ripple stitch can add beautiful texture and dimension to your handmade creations.
